
How to Make a CMYK Woodcut Print with a Laser Engraver
Tip: If you're curious about the tools and materials I use in the studio, I keep a simple page with everything in one place. You can explore it here: Tools & Materials I Use.
Mixing Old and New
I recently finished a project that's been on my mind for a while: using a laser engraver to cut four separate woodcut blocks, then printing them with traditional CMYK process colors.
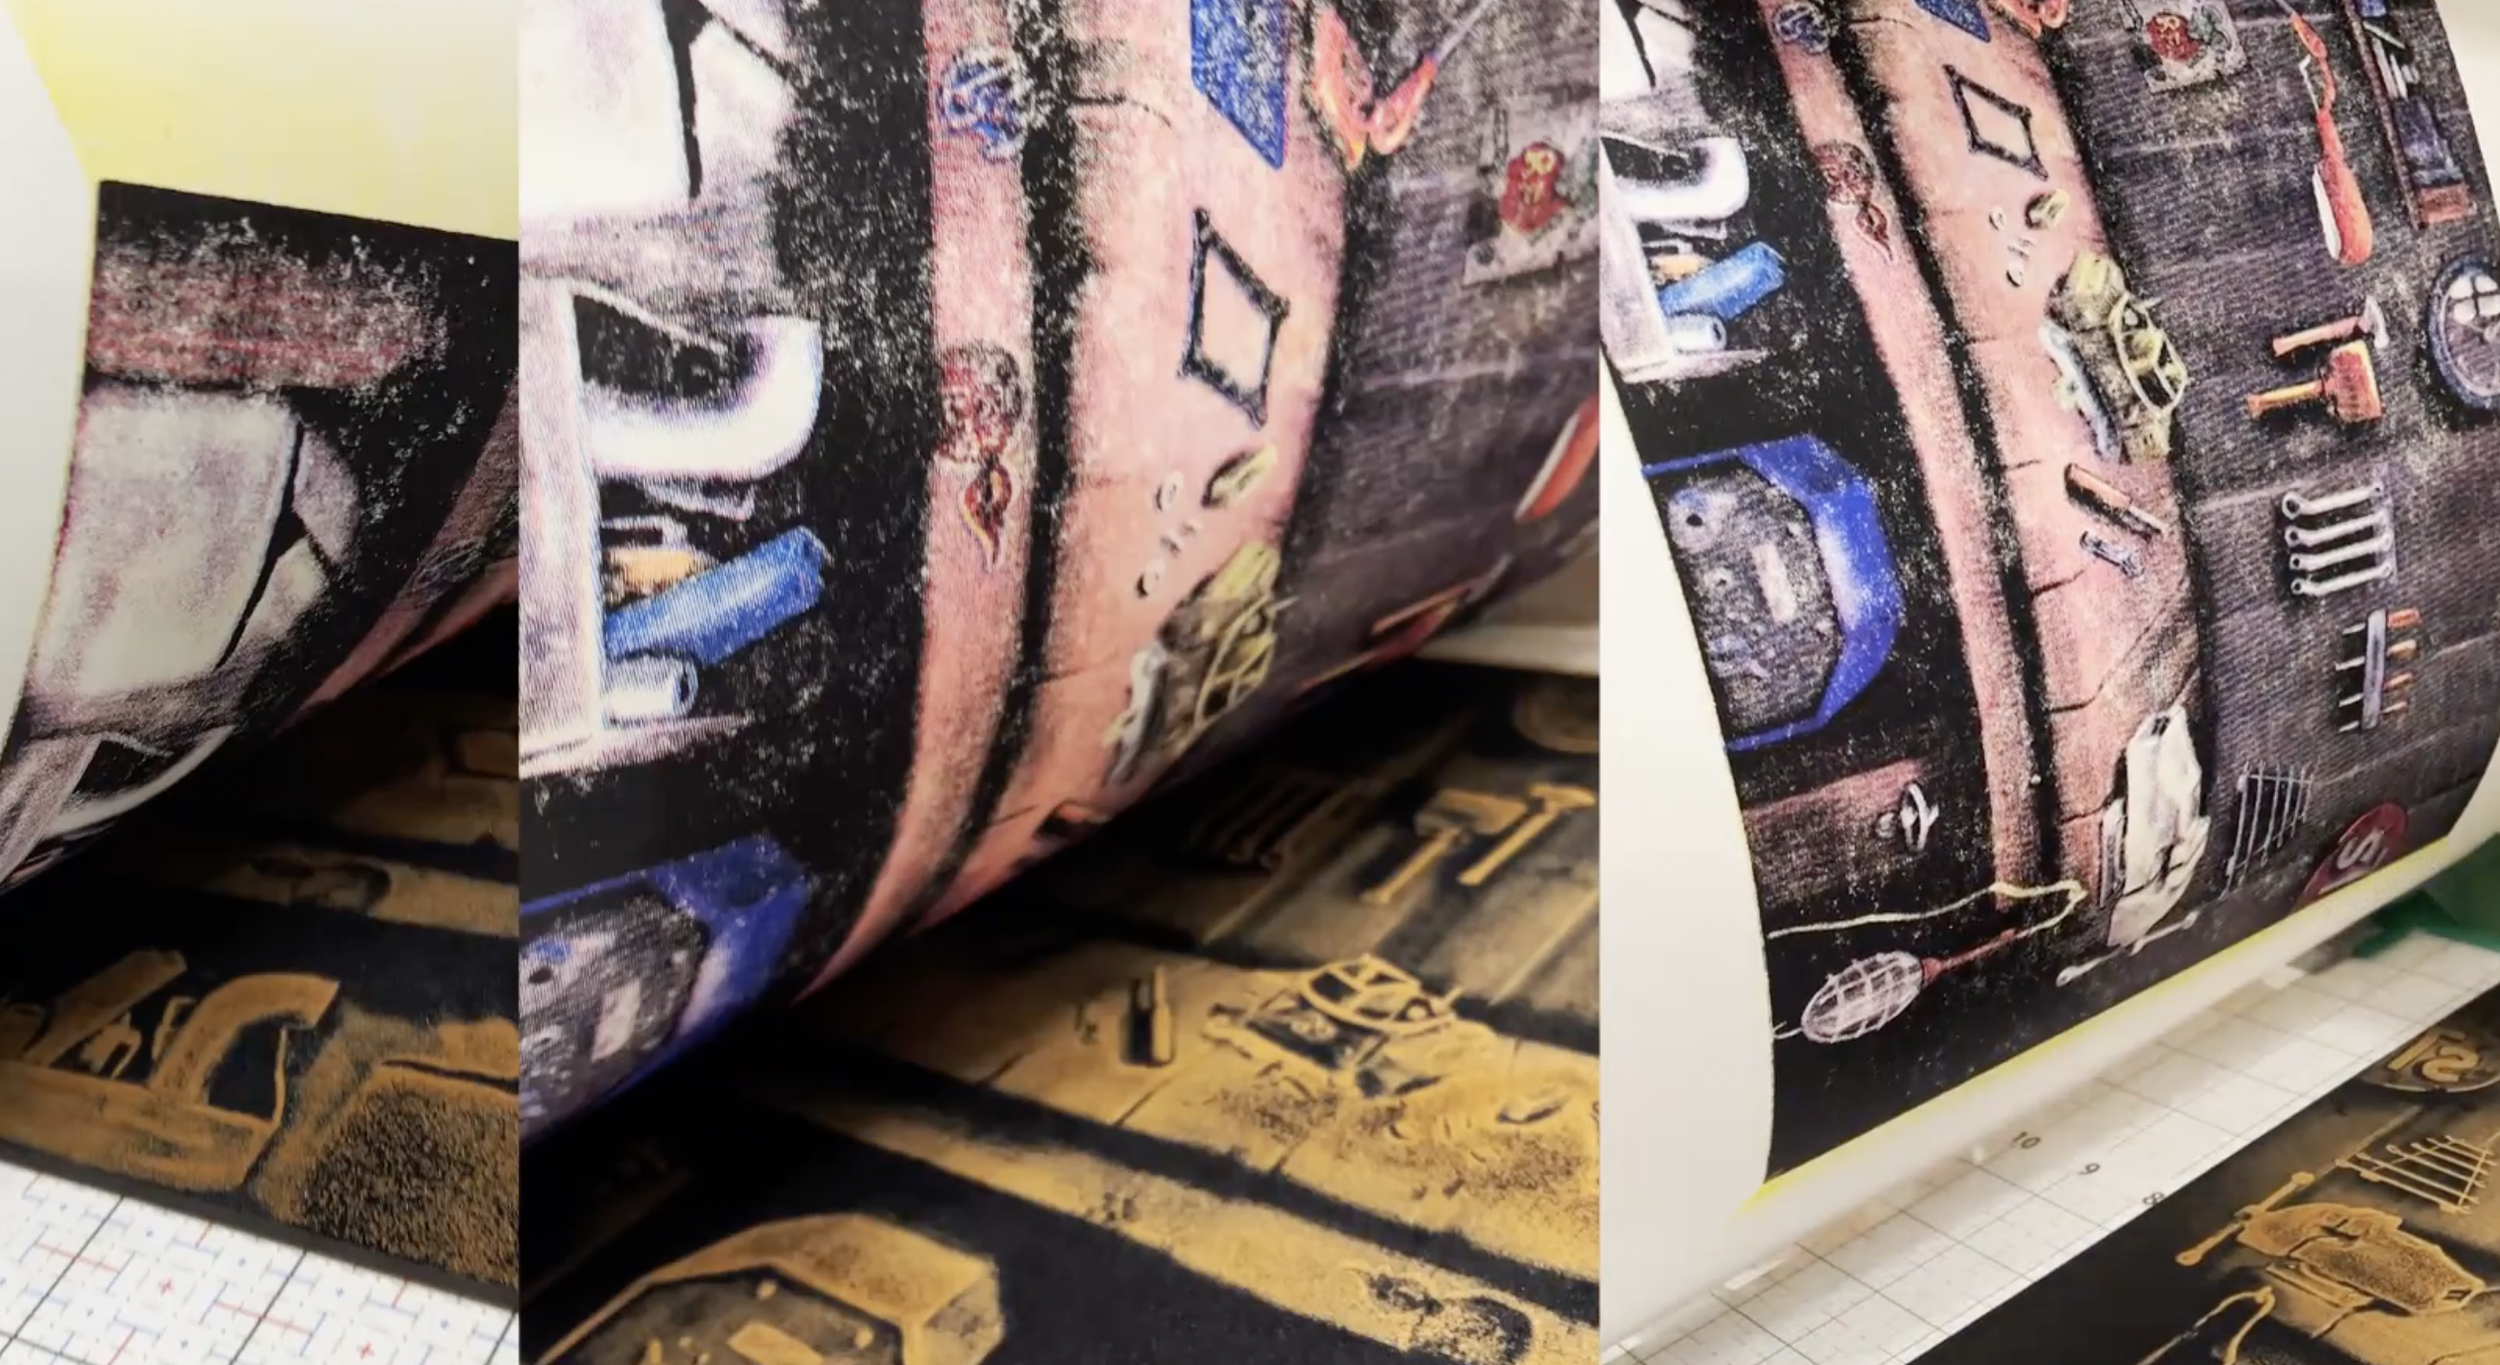
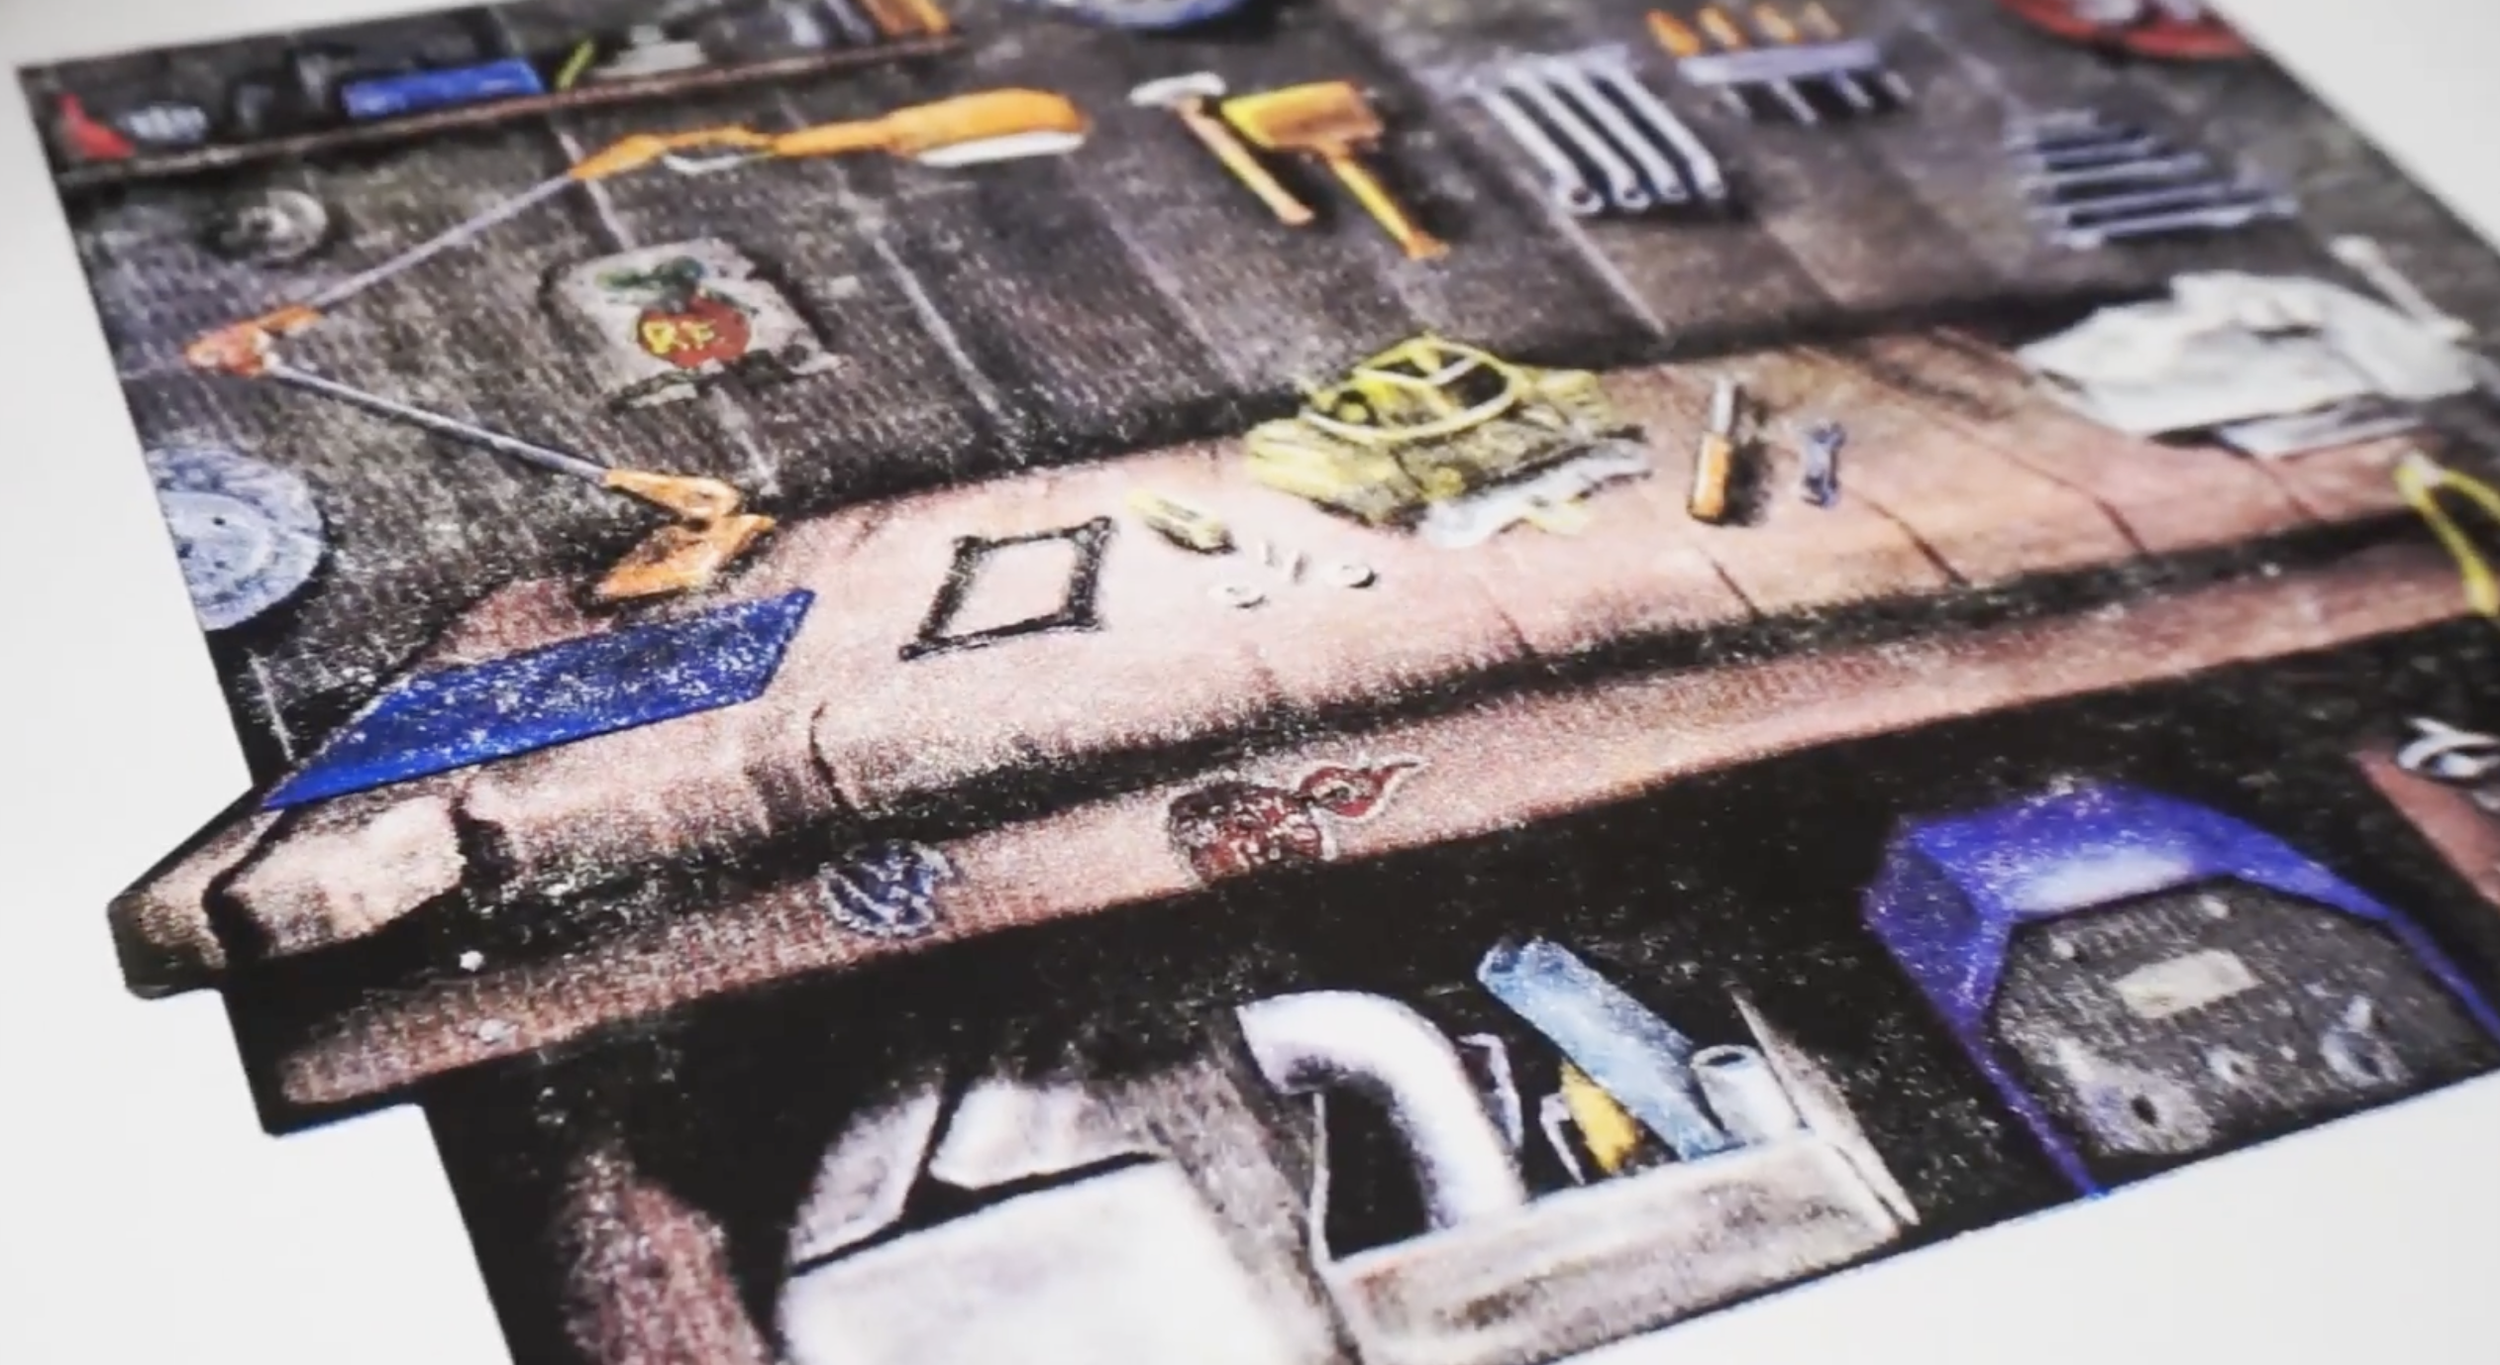
Unlike spot color woodcuts where each layer sits on top of the next, CMYK printing uses tiny halftone dots of cyan, magenta, yellow, and black to create the illusion of a full spectrum of colors.
The image itself came together over many late nights holding my sleeping newborn son. Those quiet hours got me thinking about my own childhood and all that time spent in the garage with my dad working on cars. This print is a piece of that memory.
The Process Overview
I drew the artwork in Procreate on my iPad, then broke it into four halftone layers in Photoshop. Each layer became a separate PDF ready for the laser.
I used Lightburn software to control my xTool D1 Pro 20W diode laser, cutting on 3/4” MDF at 15,000 mm per minute and 95% power. Each block took about two hours to cut. I did each one in a single session to avoid any alignment shifts that would show up in the final print.
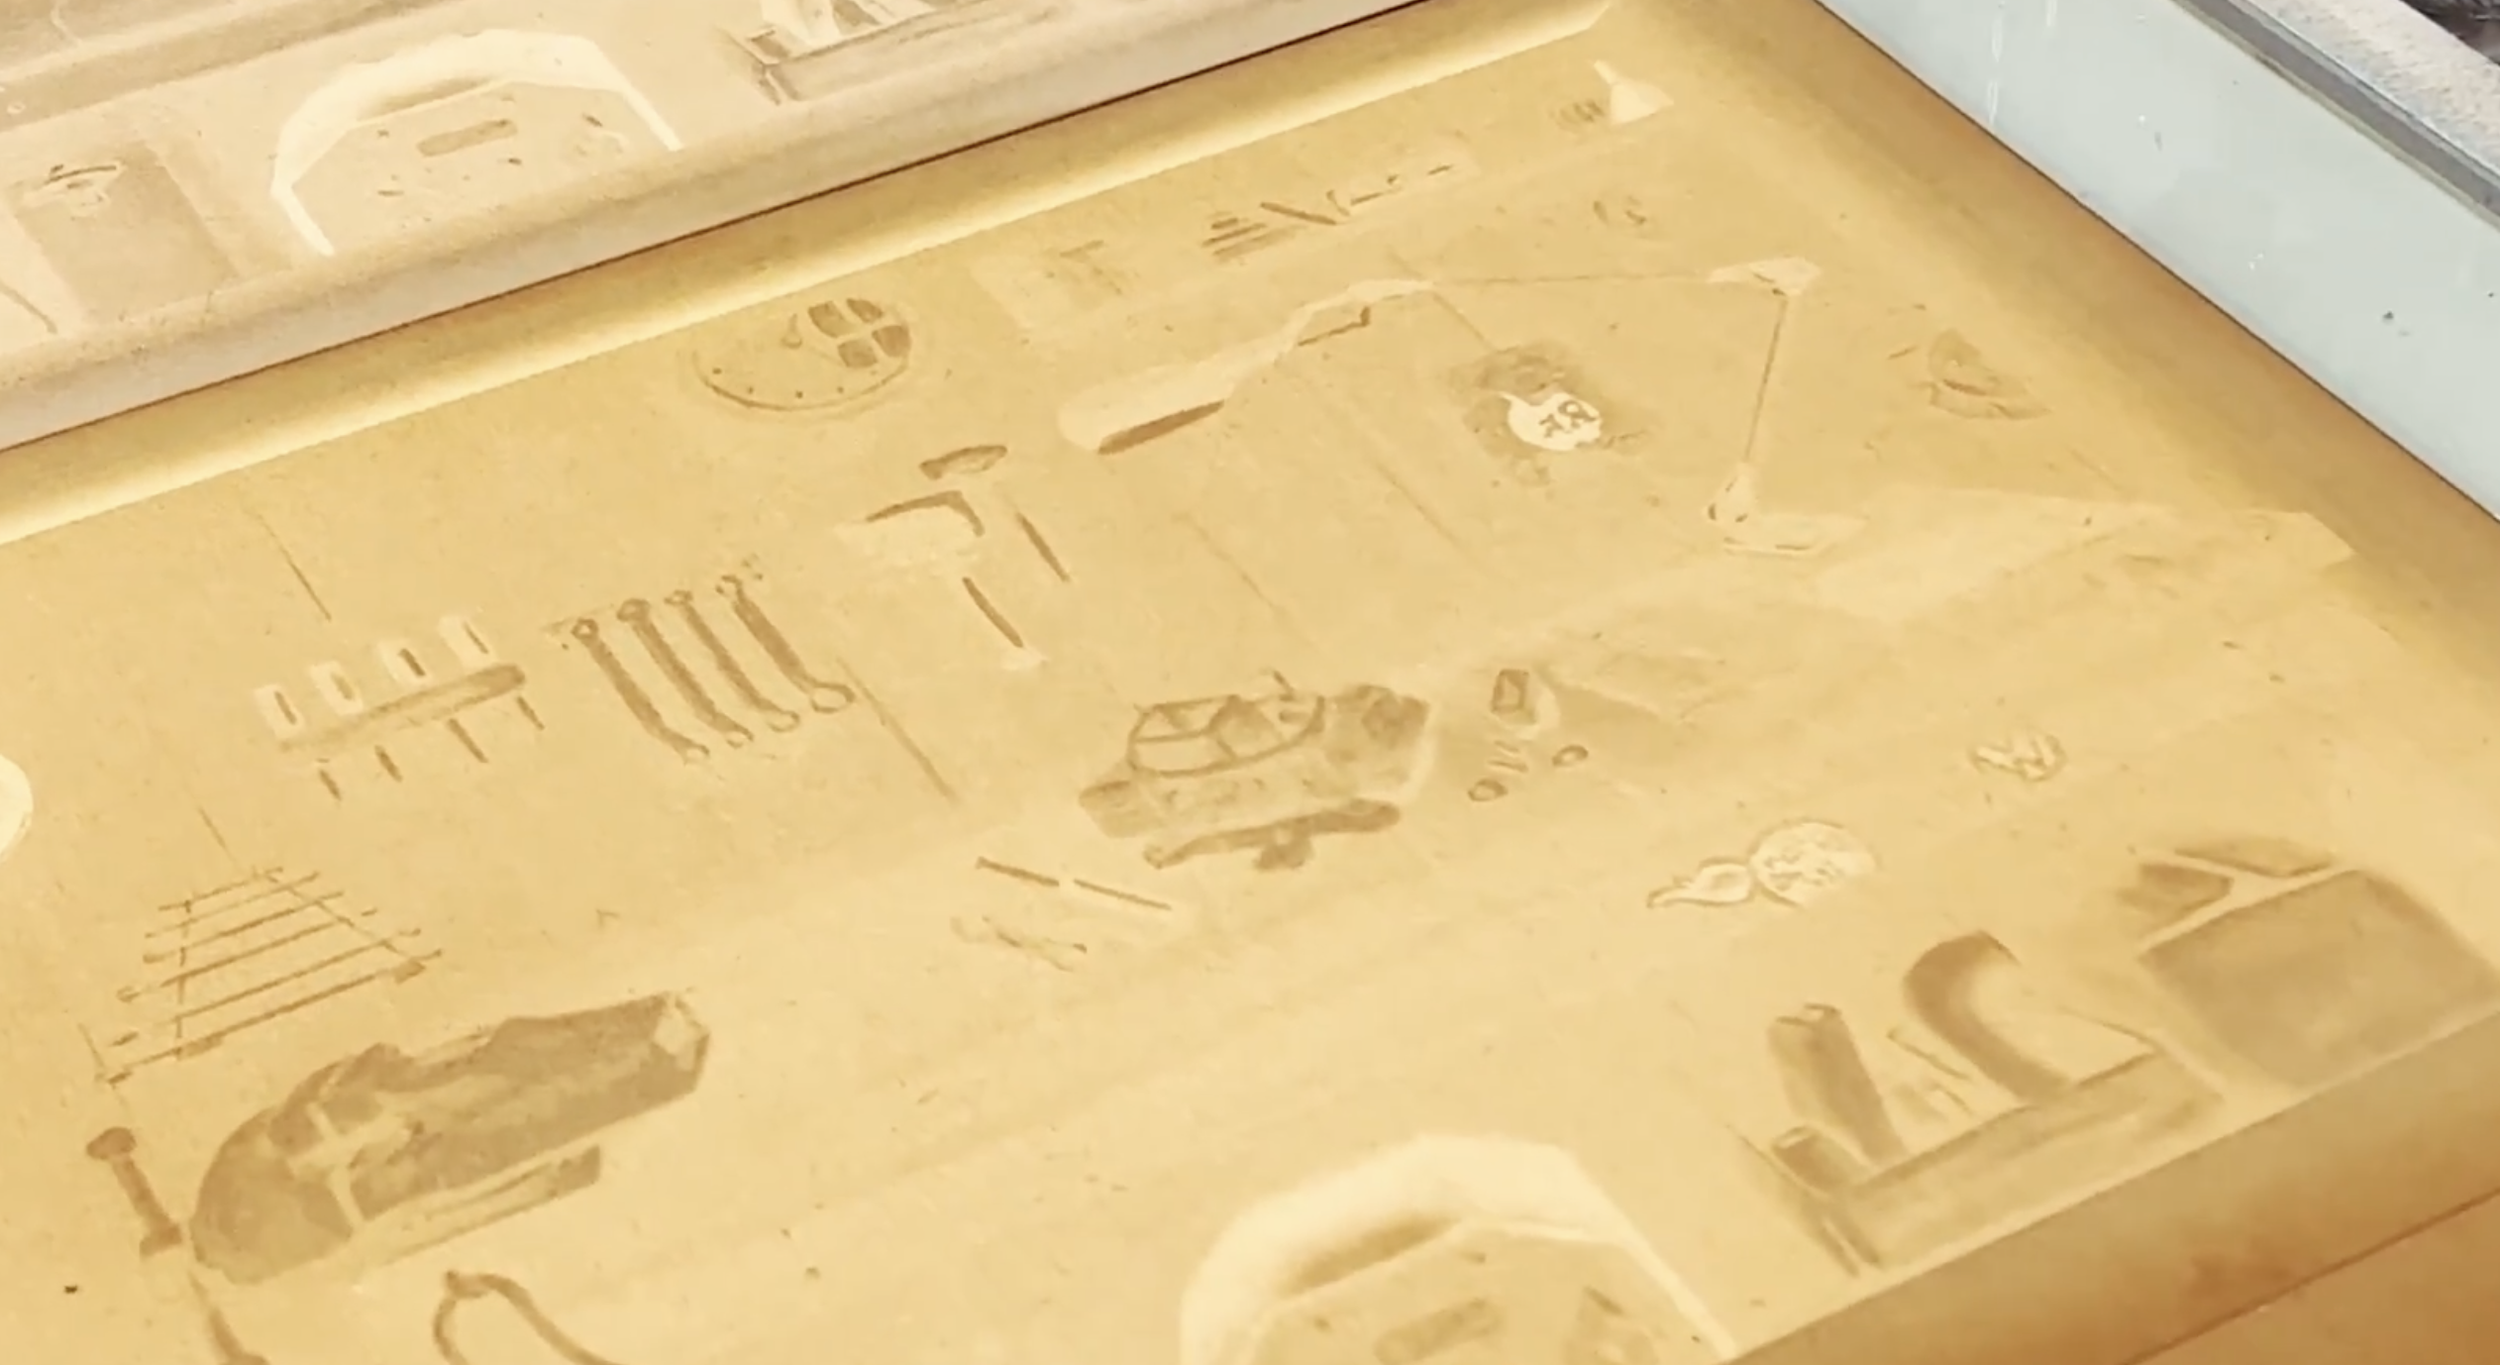
MDF holds incredible detail, but it does make a mess with all the glue and soot it releases during cutting.
Registration and Printing
For registration, I used my Linocut registration jigs as stoppers and Ternes Burton pins taped to the press bed. The pins and tabs create a repeatable setup so each color lines up exactly.
I want to thank Speedball for collaborating with me on this project and providing the Arnhem paper, oil-based inks, and brayers. Their support made it possible to experiment with combining new and old printmaking methods.
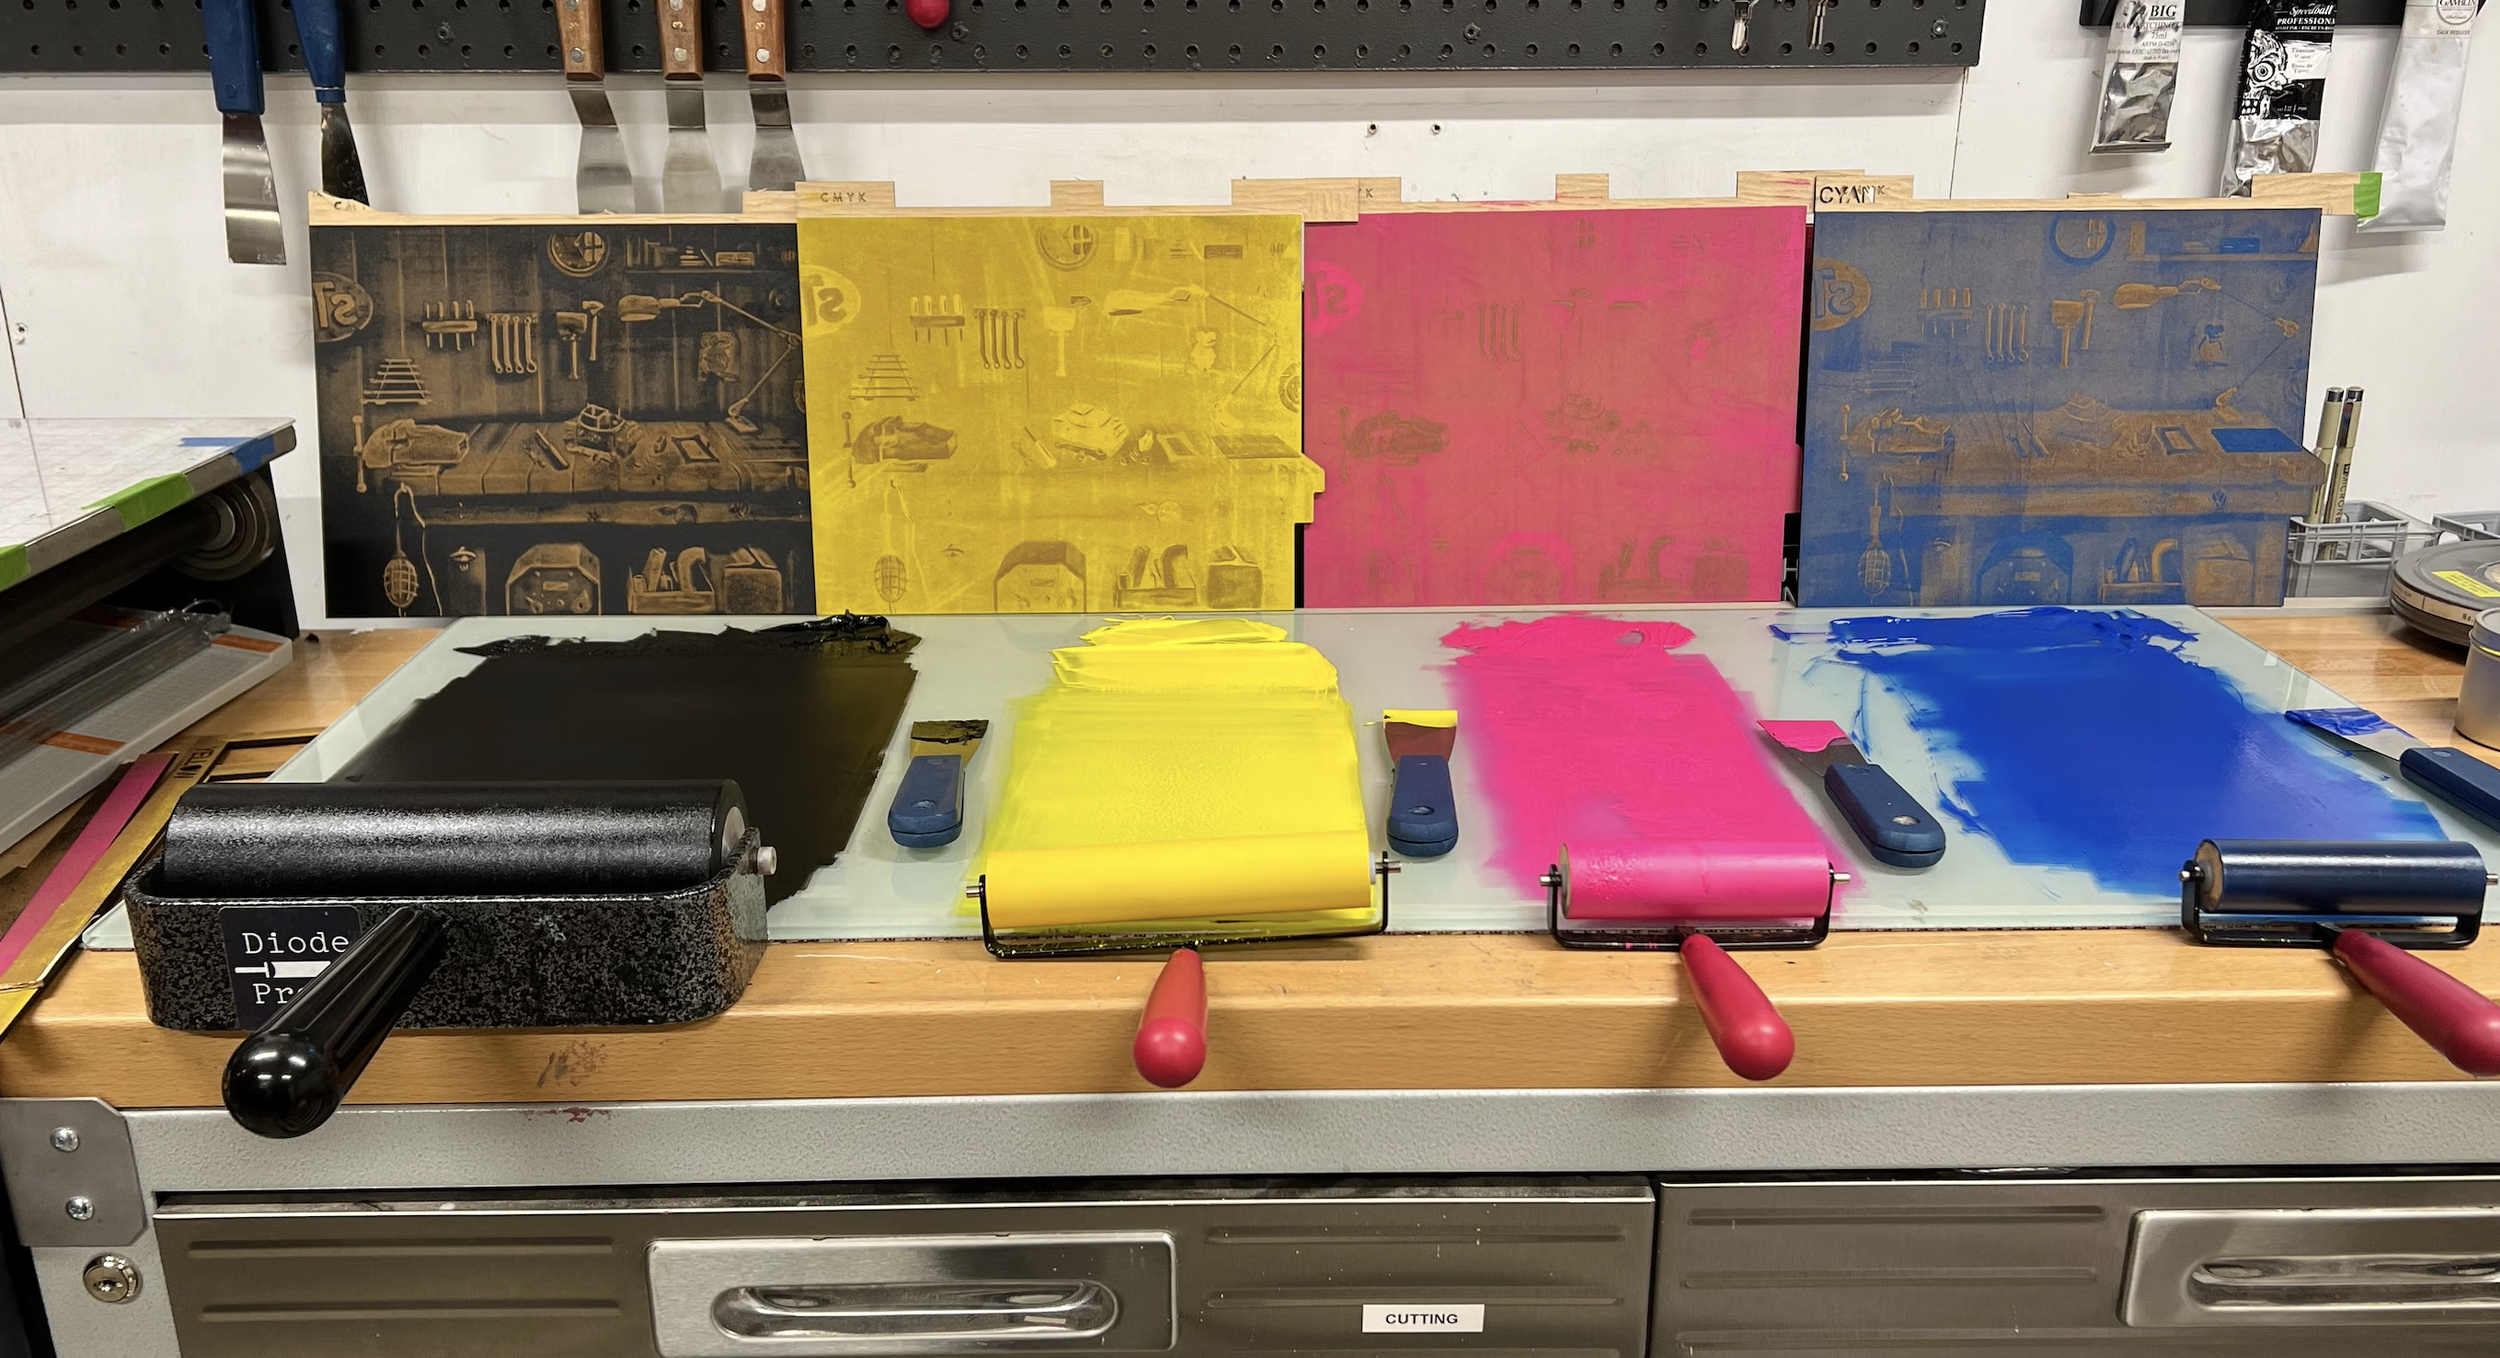
I printed in YMCK order (yellow, magenta, cyan, black) on my Takach Etching Press. The trick with laser-cut blocks is using light passes with the brayer so you don't fill in the tiny spaces between halftone dots.
After weeks of planning and cutting, the test print came out exactly as I'd hoped. The final prints show remarkable detail when you zoom in close.
What's Next
This project showed me that laser engraving opens up new possibilities for detailed, full-color woodcut printing. The combination of digital precision and traditional printmaking techniques creates results that would be incredibly difficult to achieve by hand.
Want to see the full process? I walk through every step in detail on my YouTube channel, from creating the digital art to the final cleanup.