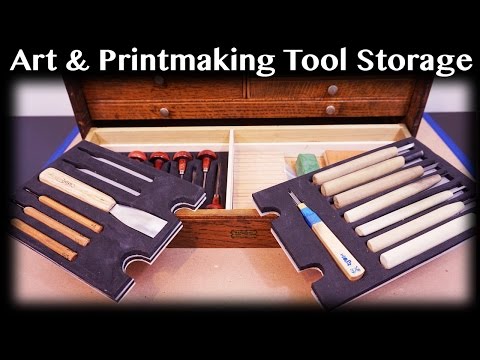
Printmaking and Art Tool Storage Solution
This week I spent some time getting my printmaking tools organized. This storage solution can be used for anything you want to keep organized and protected. I chose to build the storage into a drawer of a toolbox, but an old cigar box, or any box would work equally as well.
Let me know if you have any questions and I'd be happy to answer and expand this post. Be sure to subscribe to the Youtube channel to keep up with new projects, and share this post with anything you think could benefit from some organization!
Here are most of the tools and supplies I used to make the storage compartments. You can find most of these at most hobby supply stores or the links below.
Material List:
(These amazon link are affiliate links, they don't cost you anything to use, but help keep my ink cans full)

I started off by building a frame to support the panel that will hold the tools. This is made from 1" tall, 1/4" thick basswood

I have a lot of tools to fit inside this drawer, so I organized them to alternate back and forth to fit best. The left side of the box will hold my honing strops for the Dockyard tools, and the regular woodcut tools.
Here I'm cutting foam sheets to size to fit the shape of the wood panel that acts as a bottom for the tools.
Using a pencil I outline the shapes of the tools onto the foam panel. Try to leave a little room so it's easy to remove the tools. You don't want to always be fighting to get them out!

I'm using Tacky glue to hold the layers of foam together. It's fairly strong once it's dried, but I would consider a more heavy duty glue if you're worried. Just make sure it's foam safe...many glues will eat through foam.


Here I'm tracing the outline for another tool in the foam.

Once it's cut out, the tool fits in perfectly snug and protected.

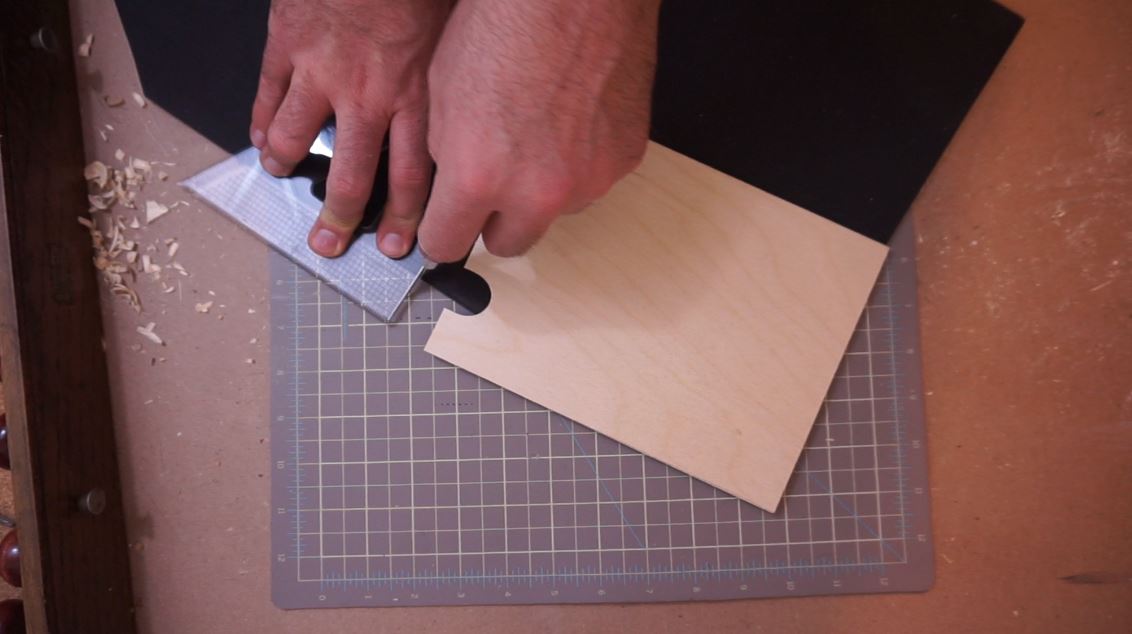
Using a metal lined straight edge and an x-acto blade, I bevel the edges of the foam. This makes it easier to remove from the box, since I need to access the tools below it.

Finally I glue down this layer of foam as well, making sure not to get glue on the parts that the tools rest against.

This panel fits snug into the box, and is left to dry overnight.

And here's the final tool drawer, ready to use!